The article below explains how to run through a Power Vision Recovery when using Dynojet’s original PV Update Client. If you have the newest client (displays pictures of red and orange connectors), you can press the blue recovery button when in recovery mode to perform this process.
If your Dynojet Power Vision PV-1 or PV-2 device fails to boot up (Your PV freezes when powered) please follow the steps below to recovery your Power Vision.
IMPORTANT NOTE: This will erase all custom tunes, data logs, or gauge configurations back to factory settings
Power Vision Recovery Instructions
- Save the following recovery file> PV Recovery To download Right click> Save As, and save it to your computer. This will be a .pvr file.
- Download PV Update Client Utility
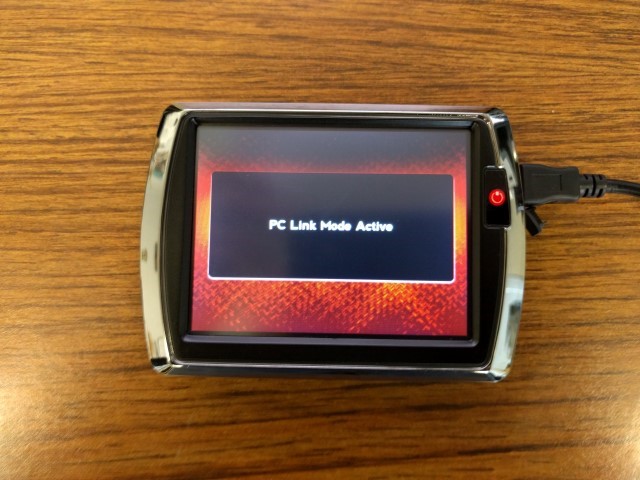
- While holding the red button on the front of your Power Vision, connect the USB cable. You should see the following screen on your Power Vision:

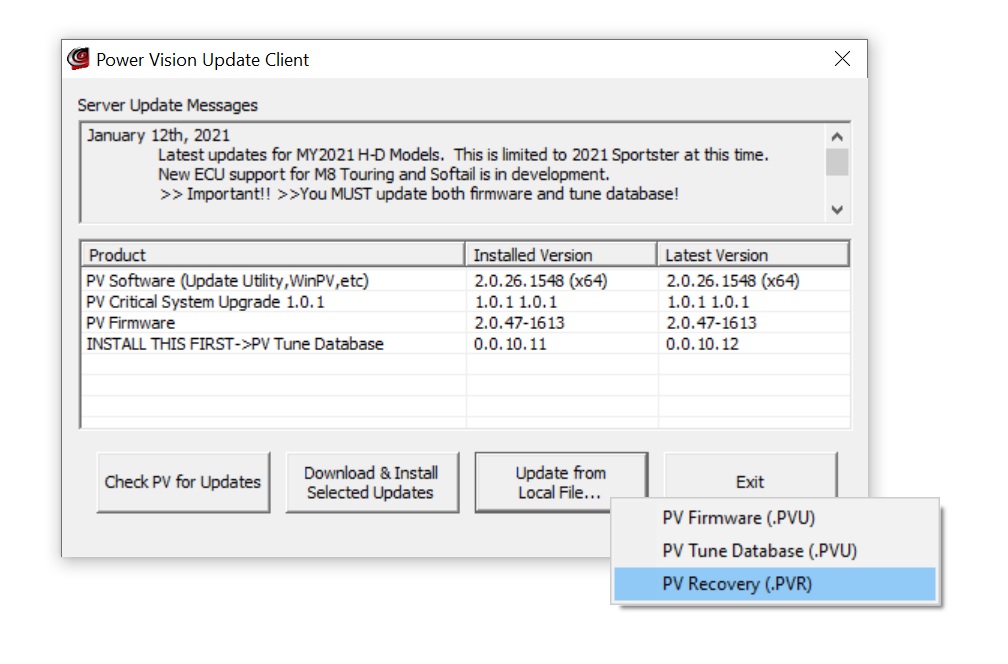
- Open PVUpdateClient, select Update from Local File, choose PV Recovery (.PVR), and select the .pvr you saved to your computer previously. It will then initiate the recovery.

Power Vision PV-1 PV-2 Firmware Update Instructions
- Plug your Power Vision into your computer via USB. You should see the ‘PC Link Mode Active’ message on the screen as seen in the following picture:

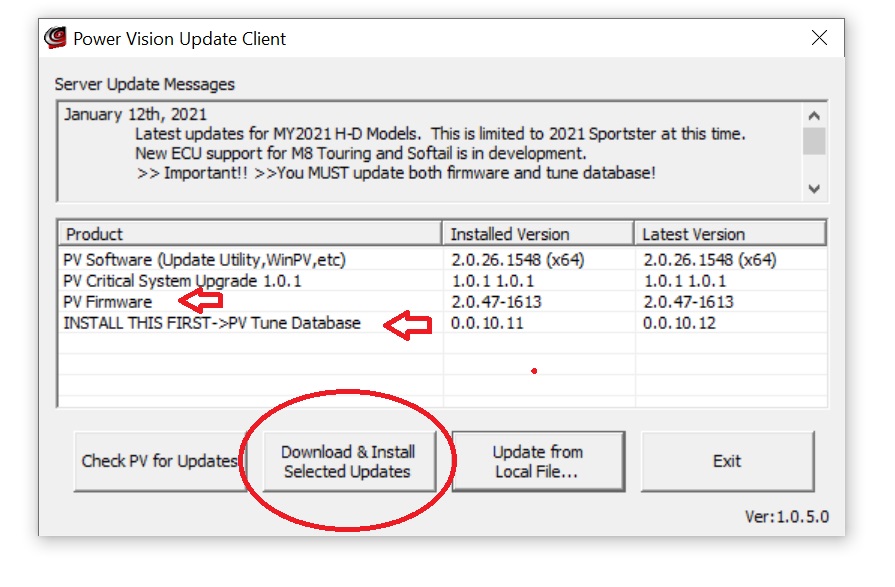
- Open the PV Update Client Utility. You can then perform any available updates. It will display Installed and Latest versions. Apply each update starting with the Tune Database.

Contact Fuel Moto for expert guidance, tuning support, and everything you need to bring your build to life.


