 Upgrading the camshaft in a Harley-Davidson Twin Cam engine can improve performance and throttle response. This guide provides detailed Twin Cam camshaft install instructions for 2007-later models, specifically demonstrated on a 2010 Harley-Davidson Ultra Limited. Always refer to the factory service manual for model-specific procedures.
Preparation and Initial Disassembly of Twin Cam Camshaft Installation
Before starting, gather all necessary tools, including bolt cutters, cam bearing tools, and adjustable pushrods if using quick-install options.
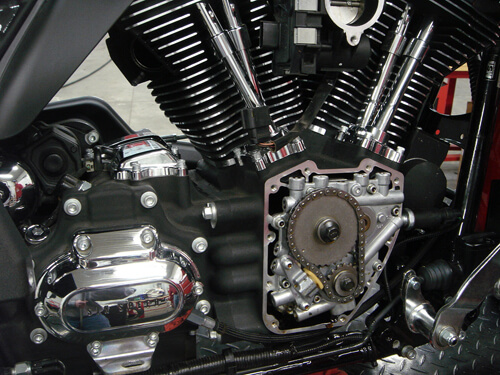
1: Remove Components for Access
- Remove the exhaust system and right-side floorboard to create space.
- Take off the cam cover for access to the cam chest.
- Put the bike on a stand and remove the spark plugs.
- Shift into 5th gear and rotate the rear wheel to align the timing marks on the cam sprockets.
2: Remove the Stock Pushrods
- If using quick-install adjustable pushrods, carefully remove the stock ones by cutting them with bolt cutters.
- Avoid using a grinder or cutoff wheel, as this creates metal debris.

 3: Secure the Lifters
 3: Secure the Lifters
- Use lifter clips to prevent the lifters from dropping into the motor after removing the cam plate.
- This step ensures an easier reassembly process.
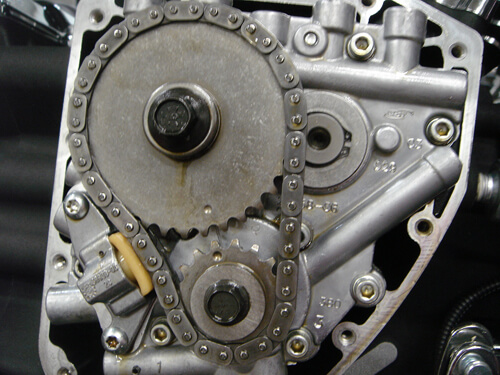
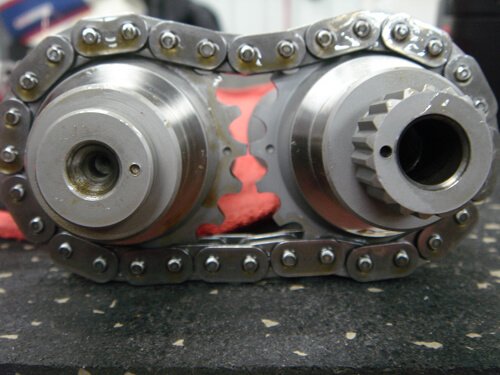
4: Remove the Cam Plate and Camshafts
- Remove the cam chain tension shoe carefully.
- Unbolt and remove the crankshaft sprocket bolt and rear cam sprocket retaining bolt.
- Unbolt the cam support plate and remove it from the engine.
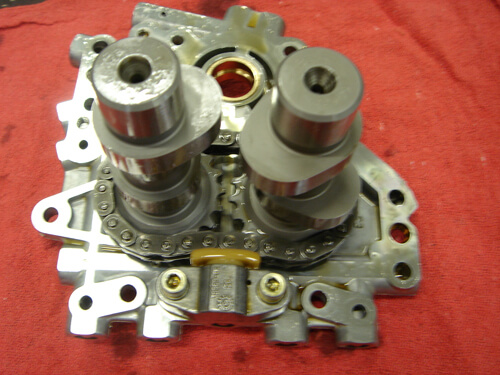
4. Detach the inner cam chain tensioner assembly and remove the old camshafts.
5. Install the new camshafts, ensuring that the timing marks align properly.


Installing the New Camshafts
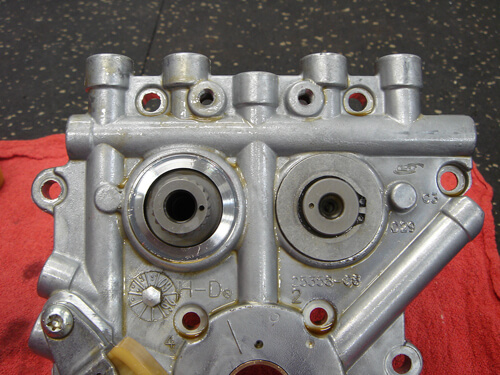
5: Replace the Inner Cam Bearings
- Use the correct bearing tools to replace the inner cam bearings.
- Proper bearing installation ensures longevity and smooth operation.
6: Reinstall the Cam Plate and Oil Pump
- Reinstall the cam plate into the engine.
- If the oil pump was not removed or serviced, simply reinstall the cam plate.
- If the oil pump was removed or replaced, it must be aligned:
- Leave the oil pump retaining bolts about a quarter turn loose.
- Put the bike in 5th gear and rotate the engine to align/center the pump.
- Once aligned, torque remaining bolts in the correct sequence following the service manual.
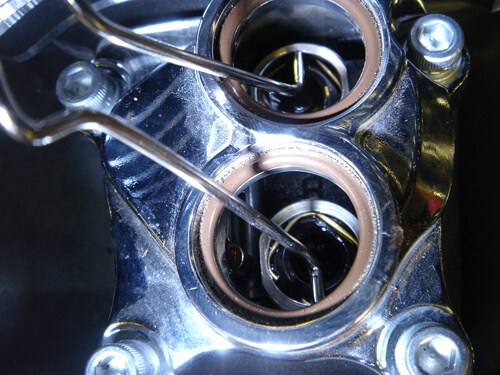
7: Adjust Pushrods
- Install and adjust the pushrods one at a time.
- Set the shortest length first on the rocker arm end.
- Rotate the engine until the pushrod is on the cam lobe’s base circle.
- Adjust the pushrod to zero lash and then follow manufacturer torque specifications.
- Tighten the jam nut (generally 2.5-4 turns depending on thread pitch) and allow the lifter to bleed down before rotating the engine.
- Repeat for each pushrod and reinstall the pushrod tube covers.
For instructions on Fuel Moto pushrods click here.
Final Assembly
8: Reassemble and Test
- Reinstall the outer cam cover securely.
- Reinstall the exhaust system and floorboard.
- Double-check torque specs and ensure all components are properly installed.
- Start the engine and check for any leaks or unusual noises.
Conclusion of Twin Cam Camshaft Installation
Performing a Twin Cam camshaft install is a straightforward process with the right tools and preparation. Following these step-by-step instructions will help ensure a successful cam swap and improved engine performance.
For additional resources, check out: