Why Configure Auto Tune?
The Power Commander V Auto Tune feature adjusts fuel delivery in real time. By using wideband O₂ sensors, it corrects air/fuel ratios while you ride. However, correct setup is crucial for consistent and safe performance.
Step-by-Step: Configuring Auto Tune
Before starting, make sure you have an Auto Tune kit installed. Remember, Auto Tune and Map Switch cannot run together.
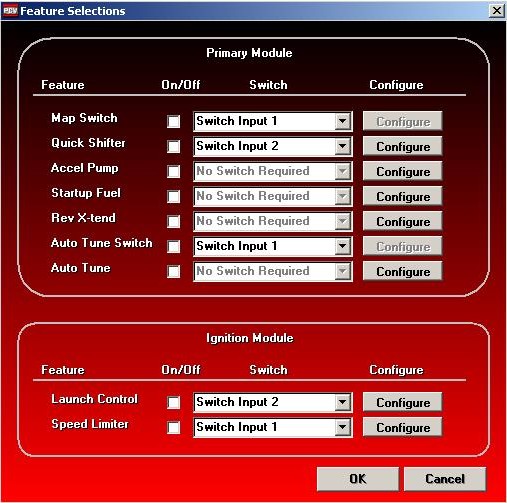
Open Power Commander Tools > Configure > Feature Enables and Selection Inputs.
Check the On/Off box to enable Auto Tune.

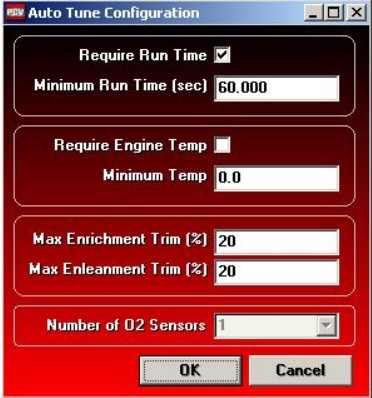
Click Configure to open the Auto Tune Configuration window.
Adjust Require Run Time (time after startup before Auto Tune begins).
Adjust Require Engine Temp (engine must reach this temperature before Auto Tune activates).
Enter Trim Settings:
Max Enrichment Trim (maximum fuel increase).
Max Enleanment Trim (maximum fuel decrease).
Select the number of O₂ sensors.
Click OK to save changes.

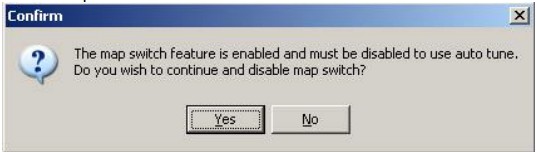
Confirm changes in the Feature Selections window.
Click Yes to disable Map Switch and enable Auto Tune.

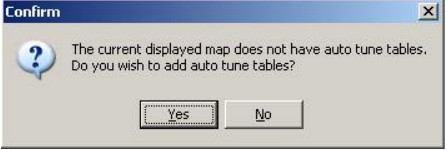
Click Yes to add Auto Tune tables.
Note: Map position 2 tables will be replaced.

Choose the device and tuning style:
Single Fuel Device – tunes only the PCV.
Both Fuel Devices – tunes PCV and SFM together.
Throttle Position – tunes by throttle input.
Pressure – tunes by engine pressure input.
Pro Tips
Always start with a solid base map before enabling Auto Tune.
Double-check engine temperature settings for your specific bike.
Recheck trim values regularly for balanced tuning.
Key Takeaways
Configuring Auto Tune in Power Commander V ensures accurate, real-time tuning.
It cannot run with Map Switch enabled.
Settings like run time, temperature, and trim limits are essential.